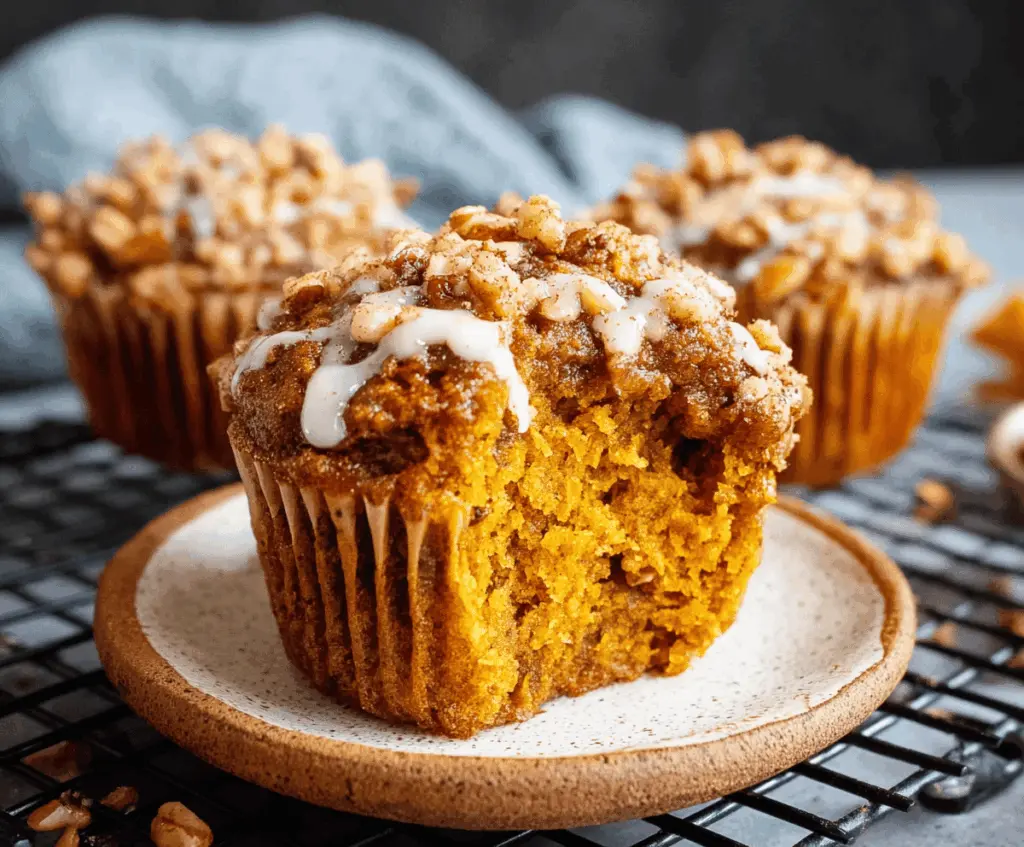
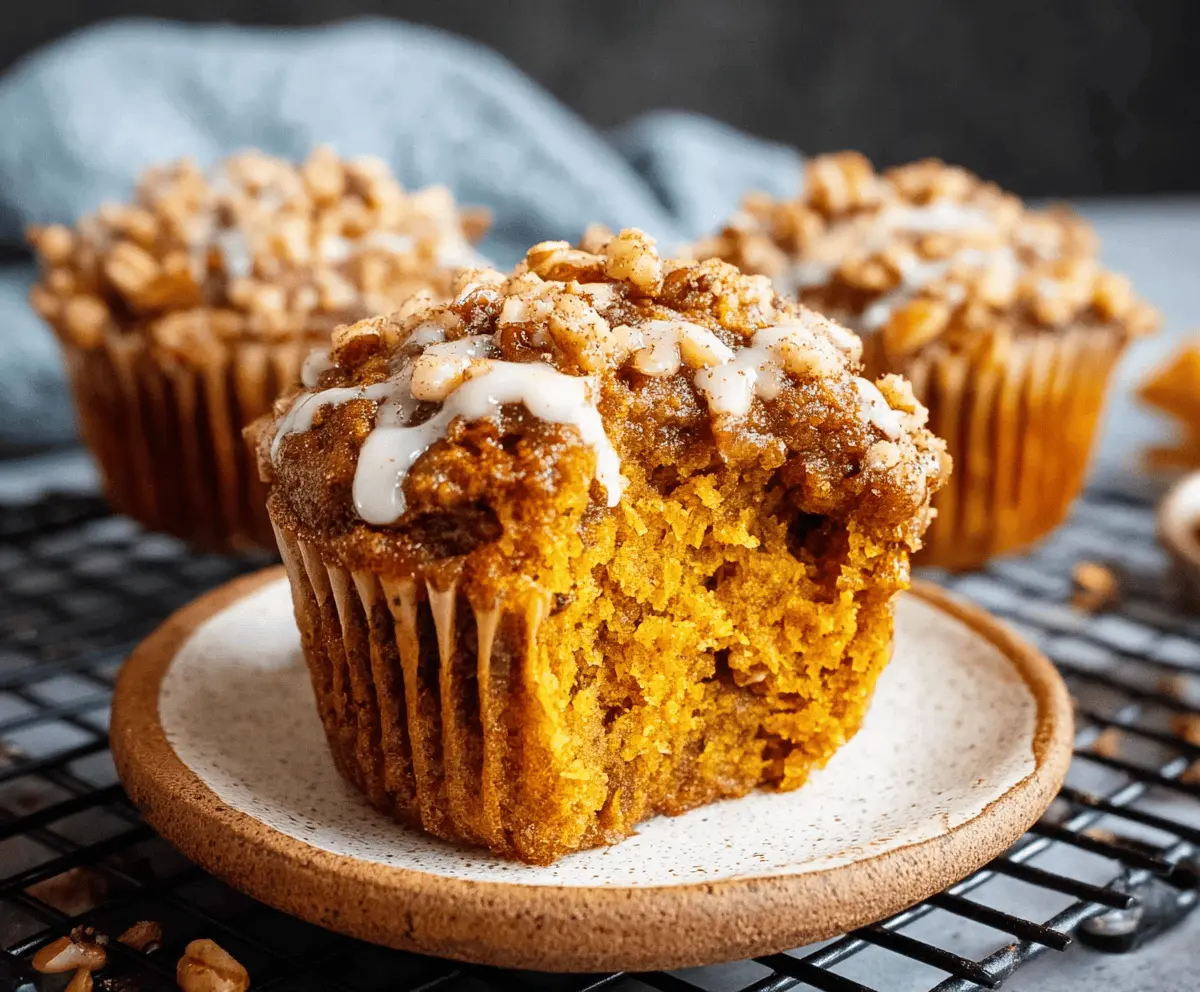
These healthy pumpkin muffins are a treat you can feel good about! Made with real pumpkin and warm spices, they are moist and delightful. Perfect for breakfast or a snack!
I love how easy they are to whip up, and the smell while baking is amazing! Plus, they freeze well, so I always have a tasty option ready to go. Enjoy a muffin with your coffee! ☕️
Key Ingredients & Substitutions
Whole wheat flour: This provides a nutty flavor and healthy fiber. If you want a lighter texture, try using all-purpose flour or a gluten-free blend.
Pumpkin puree: Make sure it’s pure pumpkin, not pie filling! If you’re in a pinch, you can use sweet potato puree as an alternative.
Coconut sugar: It adds a caramel flavor; however, brown sugar works just as well if you don’t have it. For lower calories, consider using a sweetener like stevia.
Greek yogurt: For moisture and protein! You can swap it with a dairy-free yogurt or even use unsweetened applesauce if you’re looking to cut back on dairy.
Pumpkin pie spice: You can easily mix your own with cinnamon, nutmeg, ginger, and cloves if you’re out of a premade blend. This will save space in your spice rack!
How Do I Make Sure My Muffins Are Light and Fluffy?
A common challenge is achieving that fluffy texture. Here are some tips:
- Don’t overmix: Gently fold the dry ingredients into the wet until just combined. Overmixing can lead to dense muffins.
- Room temperature ingredients: Ensure your eggs and yogurt are at room temperature. This helps the batter mix evenly.
- Use baking soda correctly: Make sure your baking soda is fresh for the best rising. If unsure, add a drop of vinegar to test its fizz!
- Let them cool: If you prefer a moist muffin, don’t leave them in the pan too long. Transfer them to a wire rack to cool.
With these tips, your healthy pumpkin muffins will be a hit every time! Enjoy baking!
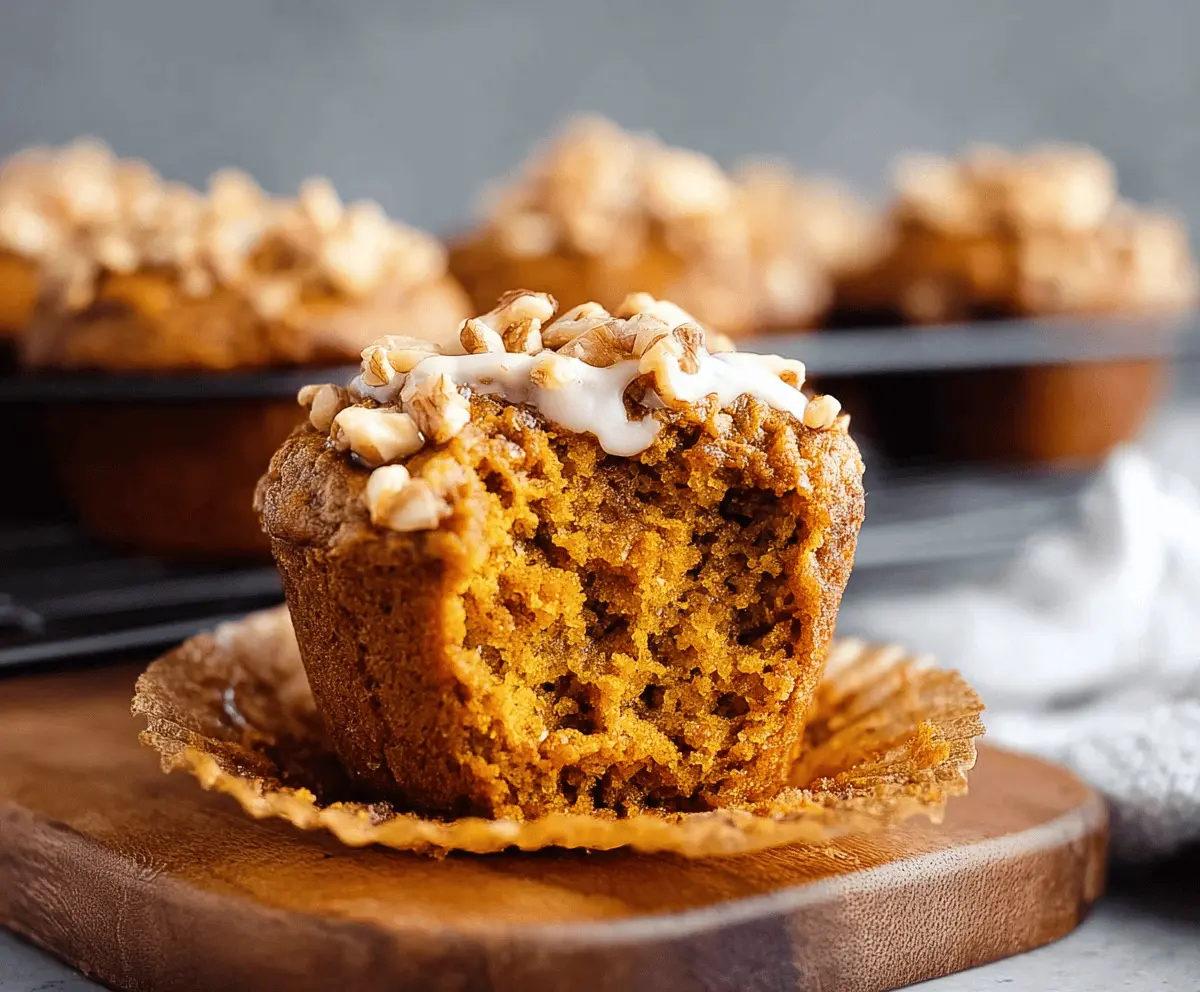
Healthy Pumpkin Muffins
Ingredients You’ll Need:
- 1 3/4 cups whole wheat flour
- 1 teaspoon baking soda
- 2 teaspoons pumpkin pie spice (or a mix of cinnamon, nutmeg, ginger, and cloves)
- 1/2 teaspoon salt
- 1/2 cup coconut sugar or brown sugar
- 1/4 cup pure maple syrup or honey
- 1/3 cup unsweetened applesauce
- 2 large eggs
- 1 cup pure pumpkin puree (not pie filling)
- 1/4 cup plain Greek yogurt or non-dairy yogurt
- 1 teaspoon pure vanilla extract
- 1/2 cup chopped walnuts (for topping)
- Optional: 1/4 cup chopped walnuts or pecans for batter
For the Glaze (optional):
- 1/4 cup powdered sugar (or coconut sugar blended finely)
- 1-2 teaspoons almond milk or any milk
- 1/4 teaspoon vanilla extract
How Much Time Will You Need?
This recipe will take about 15 minutes for preparation and 20-25 minutes for baking, plus some time to cool. So, in total, you should expect around 40-45 minutes before you can enjoy your delicious muffins!
Step-by-Step Instructions:
1. Prepare the Oven and Muffin Tin:
Start by preheating your oven to 350°F (175°C). While that’s heating up, line a muffin tin with paper liners or grease it well. This helps prevent the muffins from sticking!
2. Mix the Dry Ingredients:
In a large bowl, whisk together the whole wheat flour, baking soda, pumpkin pie spice, and salt. This helps to evenly distribute the ingredients and ensures your muffins rise well.
3. Combine the Wet Ingredients:
In another bowl, beat together the coconut sugar, maple syrup, and eggs until it’s all mixed smoothly. Then, add in pumpkin puree, applesauce, Greek yogurt, and vanilla extract. Stir until everything is nicely combined.
4. Combine Wet and Dry Ingredients:
Now, it’s time to fold the dry ingredients into the wet mixture. Do this gradually until just combined. Be careful not to overmix—this keeps your muffins light and fluffy!
5. Add Nuts (if using):
If you’re including chopped walnuts or pecans, fold them gently into the batter. This adds a nice crunch!
6. Fill Muffin Cups:
Divide the batter evenly among your prepared muffin cups. Fill each one about 3/4 of the way full. Then, sprinkle some chopped walnuts on top of each muffin for a crunchy topping.
7. Bake the Muffins:
Pop the muffin tin in the oven and bake for about 20-25 minutes. You can check if they’re done by inserting a toothpick into the center—if it comes out clean, they’re ready!
8. Cool and Glaze (if desired):
Once baked, let the muffins cool in the pan for a few minutes, then transfer them to a wire rack to cool completely. If you want to add a glaze, mix the glaze ingredients together until smooth and drizzle it over the cooled muffins.
9. Enjoy:
These muffins can be enjoyed warm or at room temperature. Store any leftovers in an airtight container to keep them fresh! Enjoy your delicious and healthy pumpkin muffins!
These muffins are not only delicious but packed with wholesome ingredients, making them a perfect snack or breakfast option. Happy baking!
Can I Use Canned Pumpkin Puree Instead of Fresh?
Absolutely! Canned pumpkin puree is a great time-saver and works perfectly in this recipe. Just make sure it’s pure pumpkin and not pumpkin pie filling.
How Can I Make These Muffins Vegan?
You can easily make this recipe vegan by replacing the eggs with flax eggs. To make a flax egg, mix 1 tablespoon of ground flaxseed with 2.5 tablespoons of water. Let it sit for a few minutes until it thickens. Also, use a plant-based yogurt for the Greek yogurt.
What Should I Do If My Muffins Are Too Dense?
If your muffins turn out dense, it might be due to overmixing. To avoid this, mix just until the dry ingredients are incorporated. Also, ensure your baking soda is fresh, as expired leavening agents can lead to dense baked goods.
How to Store Leftovers?
Store leftover muffins in an airtight container at room temperature for up to 3 days. For longer storage, freeze them in a single layer on a baking sheet, then transfer to a freezer bag for up to 3 months. Thaw at room temperature before enjoying!